Working with Panels
The following examples show how a panel is prepared and created. A panel can have anything from a simple setup to a complex one. Simple panels use only Button pad controls when more complex panels use many controls.
The examples exist in the Demo Data.
Example - to create a simple panel: The #CONFIRM panel
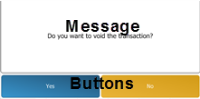
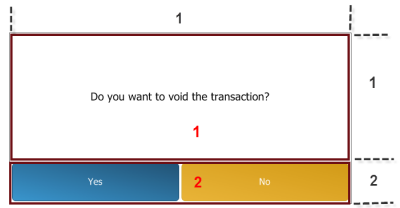
The Confirm Panel is the panel that displays the Confirmation text, the Yes and No are included in the panel.
![]()
Step 1
- Define the parts needed for this panel
-
Two parts: the message text and the buttons
- Define the information needed for each part
- A menu which displays the Information text
- A menu with Yes and No buttons
- Give each part a number
- Part 1: Information text
- Part 2: A menu with Yes and No buttons
Step 2
- Divide the panel into rows and columns depending on the defined parts
- 1 column and 2 rows
- Give each column and row a number
- Define the size for the panel; if it is a full screen panel or not
-
This panel is not a full screen panel
Step 3
- Create the panel for the Interface Profile
- Select Interface Profile ##DEFAULT if it is a panel to be valid for all setups, otherwise open the selected Interface Profile
- Fill out the fields for FastTab General
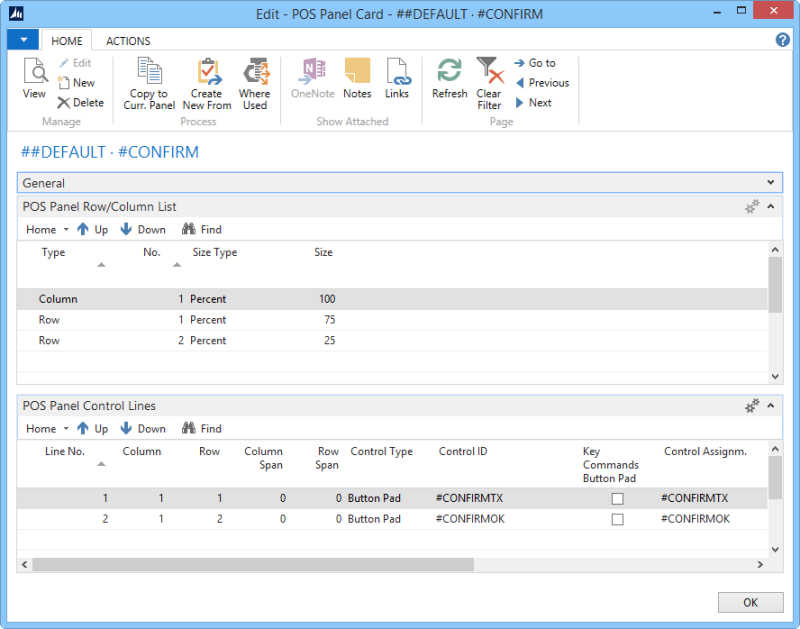
- Give the panel a Control ID: #CONFIRM
- Fill in number of columns and rows, 1 and 2
- Fill in the Width and Height for the panel. This panel is not full size so we decide width 600 and height 300, numbers are in pixels
- Fill in the POS Panel Row/Column List
- One column line and two Row lines
Column line is 100 percent and the rows 75 and 25 percent
- Fill in the POS Panel Control Lines
- Both lines have Button Pad as Control Type
- Part 1 is set for Menu #CONFIRMTX, which is part of the button pad with same name
- Part 1 is set for Menu #CONFIRMOK, which is part of the button pad with same name
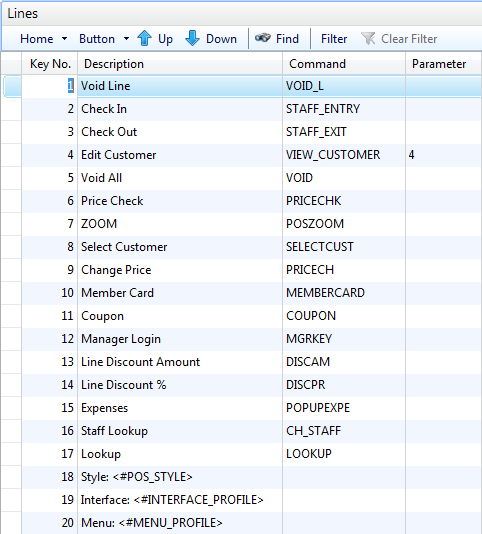
Menu Lines in Menu #CONFIRMTX:

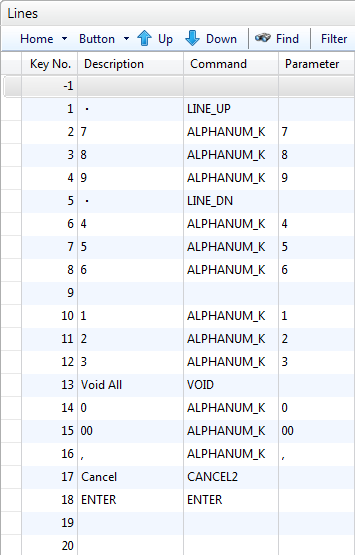
Menu Lines in Menu #CONFIRMOK:

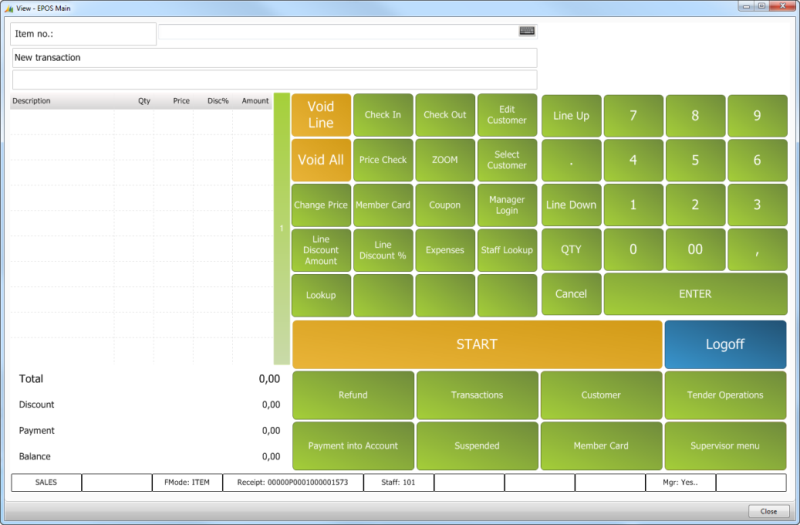
Example - to create a complex panel: The #POS panel
The #POS Panel for Store S0001 with Hyper Interface and Menu profiles looks like this:
Step 1
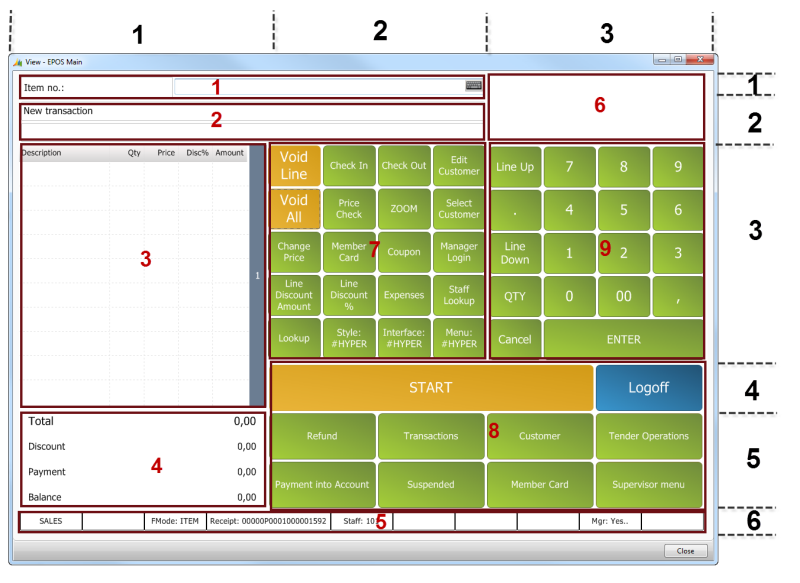
- Define the parts needed for this panel.
- Nine parts.
- Define the information needed for each part and give each part a number.
- 1 is for the Input
- 2 is for the Information message
- 3 is for the Journal
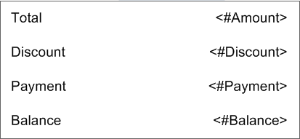
- 4 is for the Totals
- 5 is for the Status bar
- 6 is for the Store’s Logo and images of items can be viewed here as well
- 7 is for the Functions
- 8 is for the Main Menu
9 is for the POS Number Pad

Step 2
- Divide the panel into rows and columns depending on the defined parts
- 6 columns and 3 rows
- Give each column and the row a number
- Define the size for the panel; if it is a full screen panel or not
- This panel is a full screen panel
- Do some parts span more than one column or row?
- Part 1 spans 2 columns
- Part 2 spans 2 columns
- Part 3 spans 2 rows
- Part 5 spans 3 columns
- Part 6 spans 2 rows
Part 8 spans 2 rows and 2 columns
Step 3
- Create the panel for the Interface Profile.
- Select the Interface Profile ##HYPER since this is its POS panel.
- Fill out the fields for the FastTab General.
- Give the panel a Control ID: #POS.
- Fill in number of columns and rows, 3 columns and 6 rows.
- This is a full screen panel so nothing needs to be entered for the size.
- Fill in the POS Panel Row/Column List.
- Six column lines and three Row lines with size as is in the below picture.
- Have the Size Type as percent for all lines.
- Figure out the percent size my measuring the size of the parts and convert it to percentage size.
- Fill in the POS Panel Control Lines.
- Nine lines in total, the Bitmap Logo is not valid in this version.
- See the how the lines are filled out in the below picture.